Backblaze B2 在大厂的对象存储里算是非常便宜的了,如果不考虑国内访问速度,应该是非常不错的选择。由于 B2 与 CloudFlare 合作,所以套上 CloudFlare 后并不会消耗流量,所以拿来做图床是个不错的选择,下面介绍下步骤。
配置 CDN
以下步骤参考官方教程
Using Backblaze B2 with the Cloudflare CDN
-
创建一个公开的存储桶并上传文件
-
通过查看文件详细信息获得地址,比如我这里就是
1https://f002.backblazeb2.com/file/<存储桶名称>/......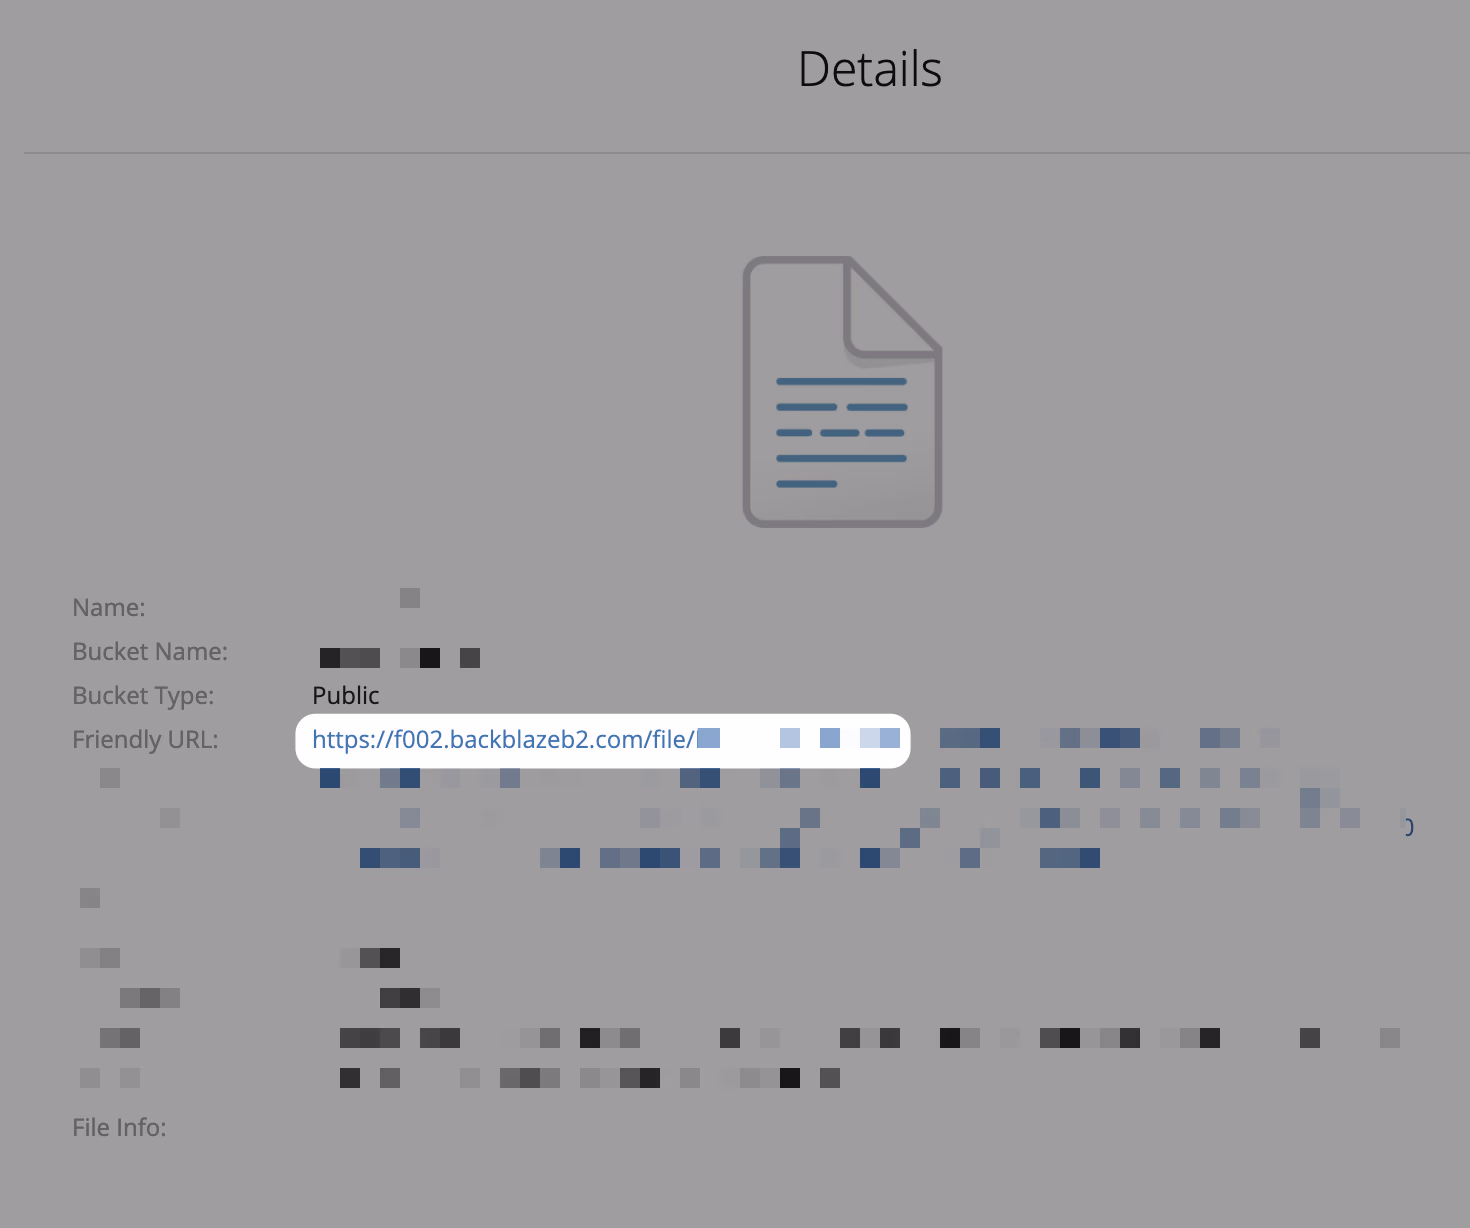
-
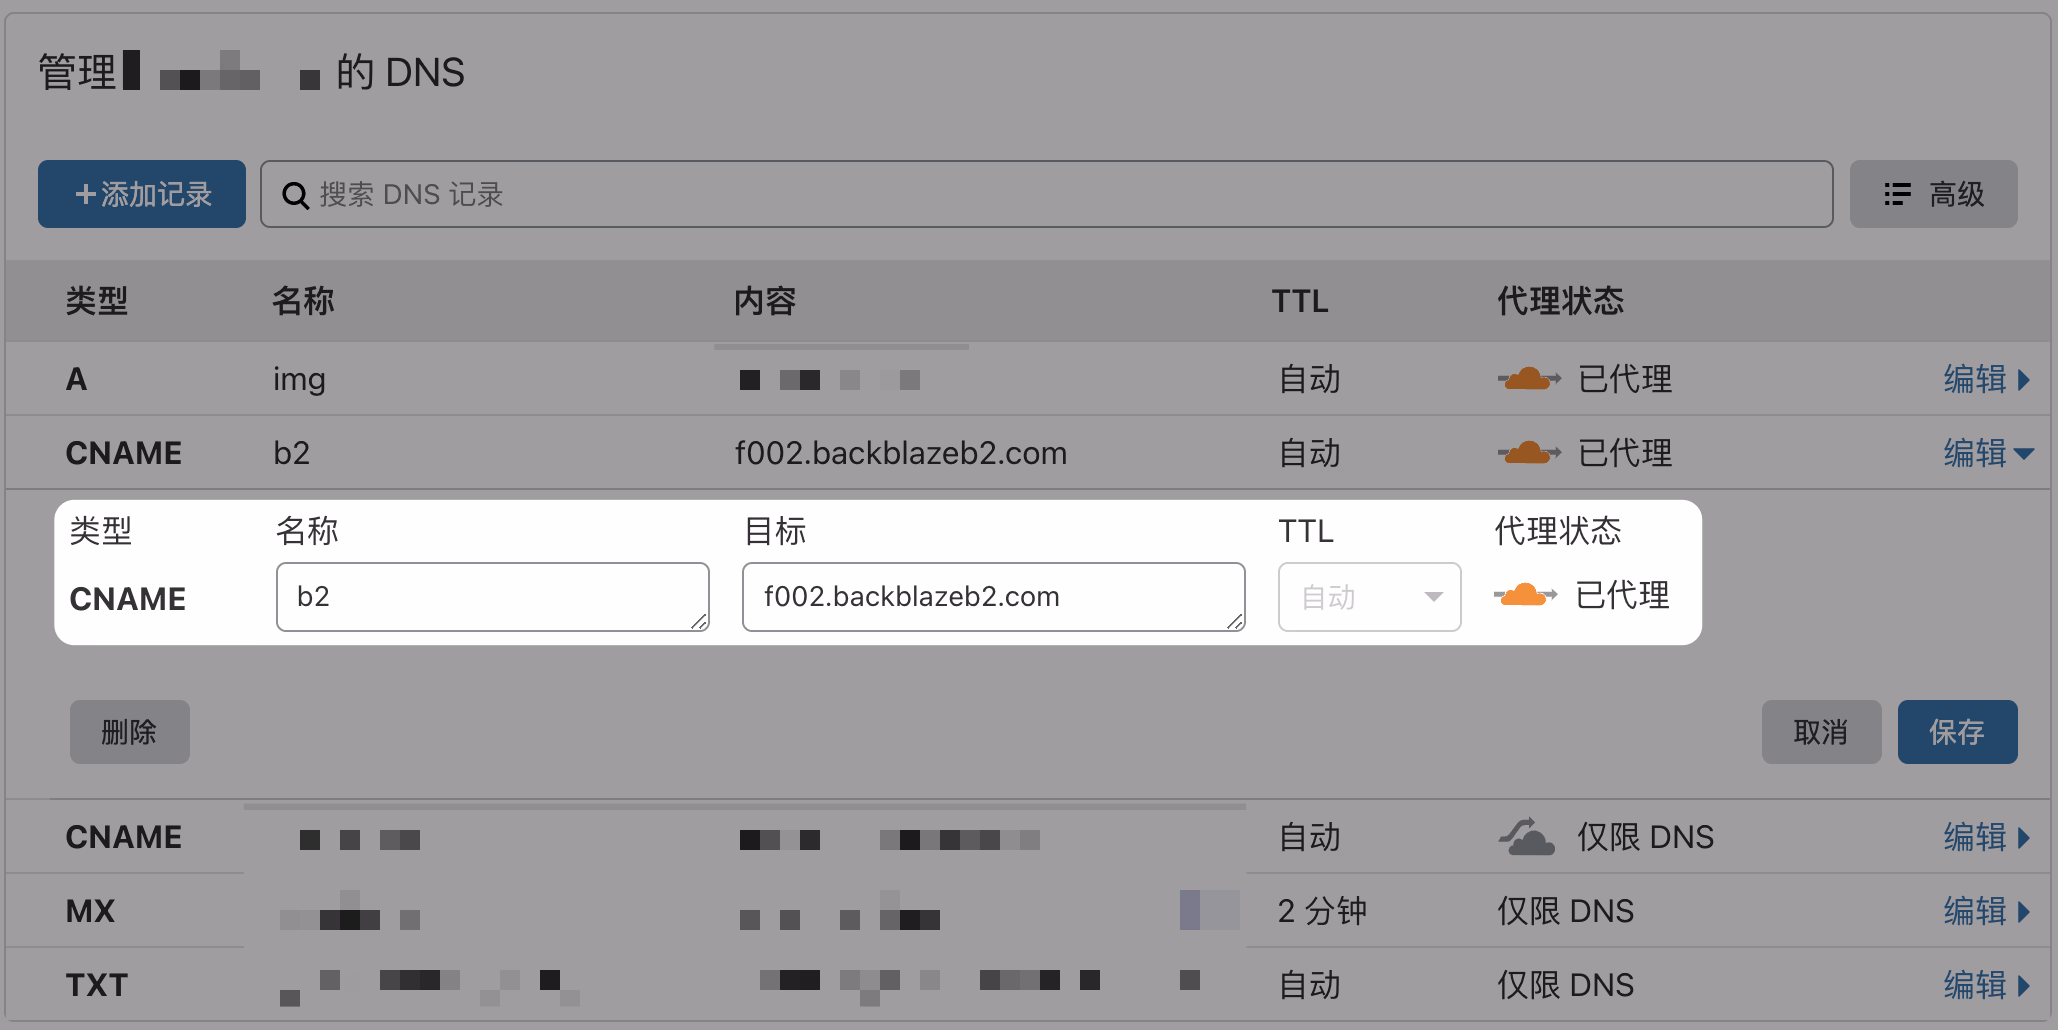
在 CloudFlare 里新建一条 CNAME 解析,地址就填刚才获得的这个 f002.backblazeb2.com
-
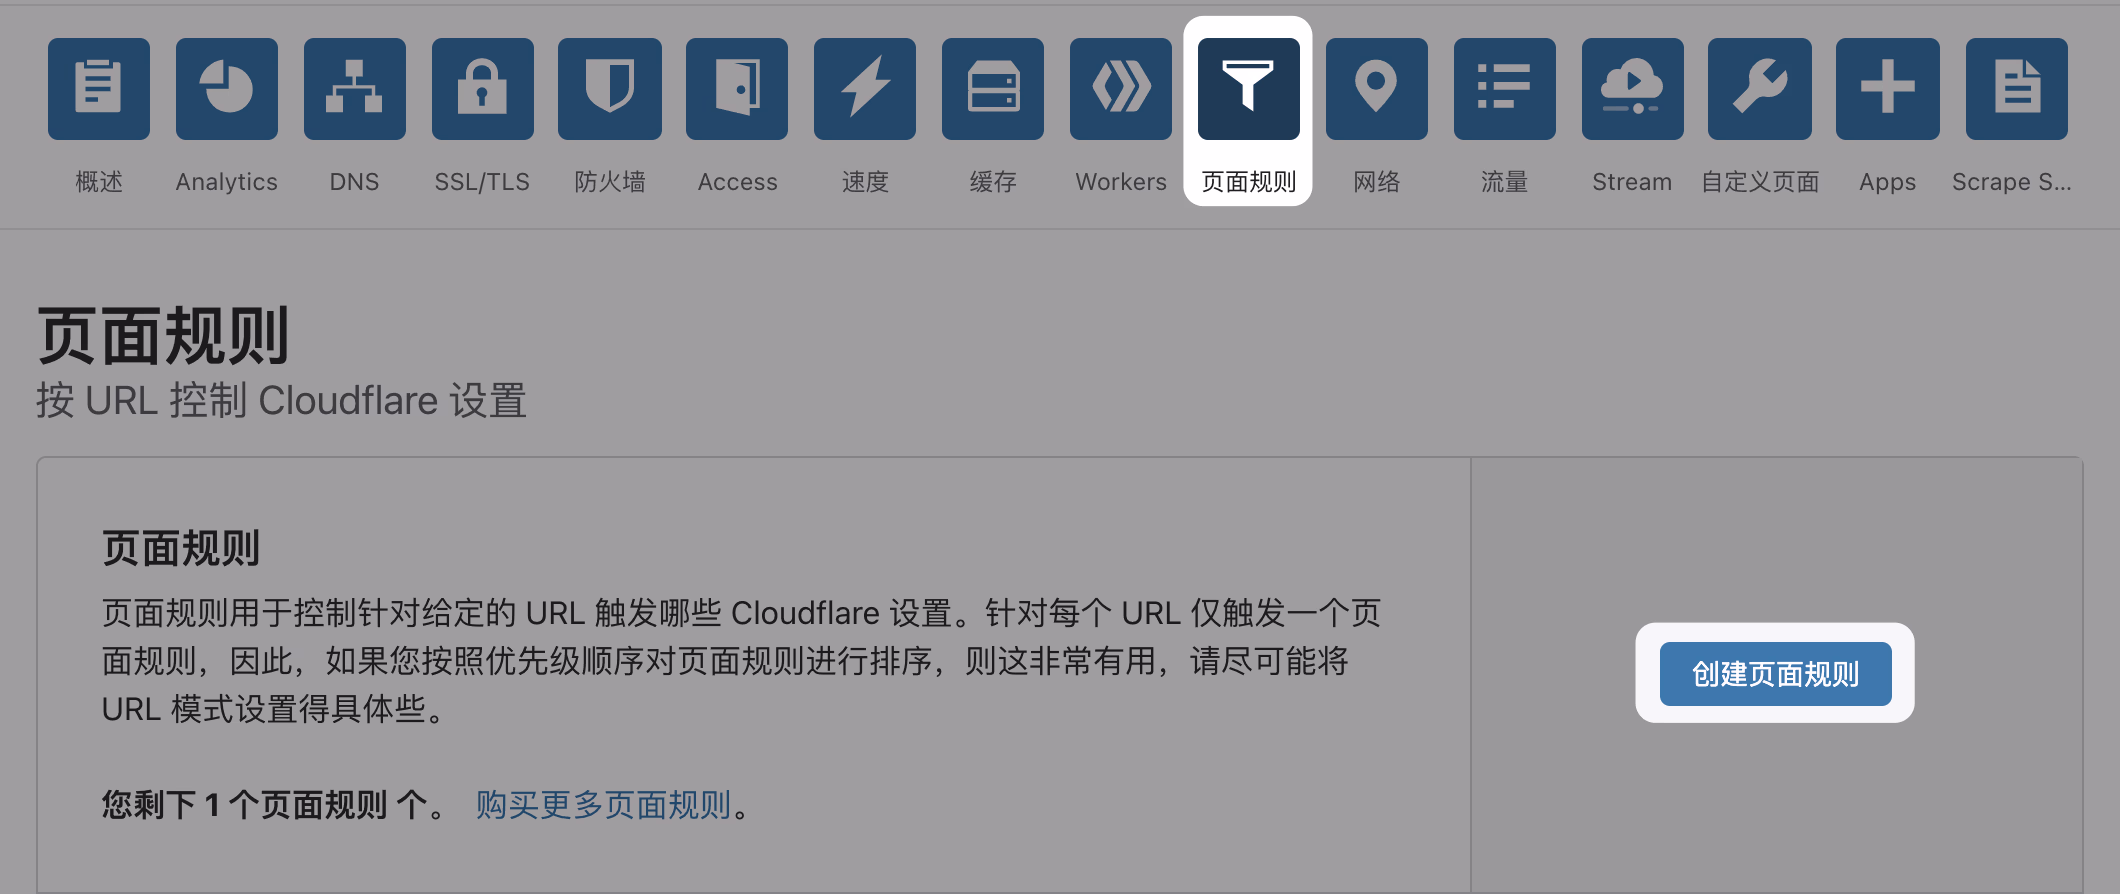
在 页面规则 里 创建页面规则
-
URL 匹配填写如下内容
1https://<刚才解析的域名>/file/<存储桶>/*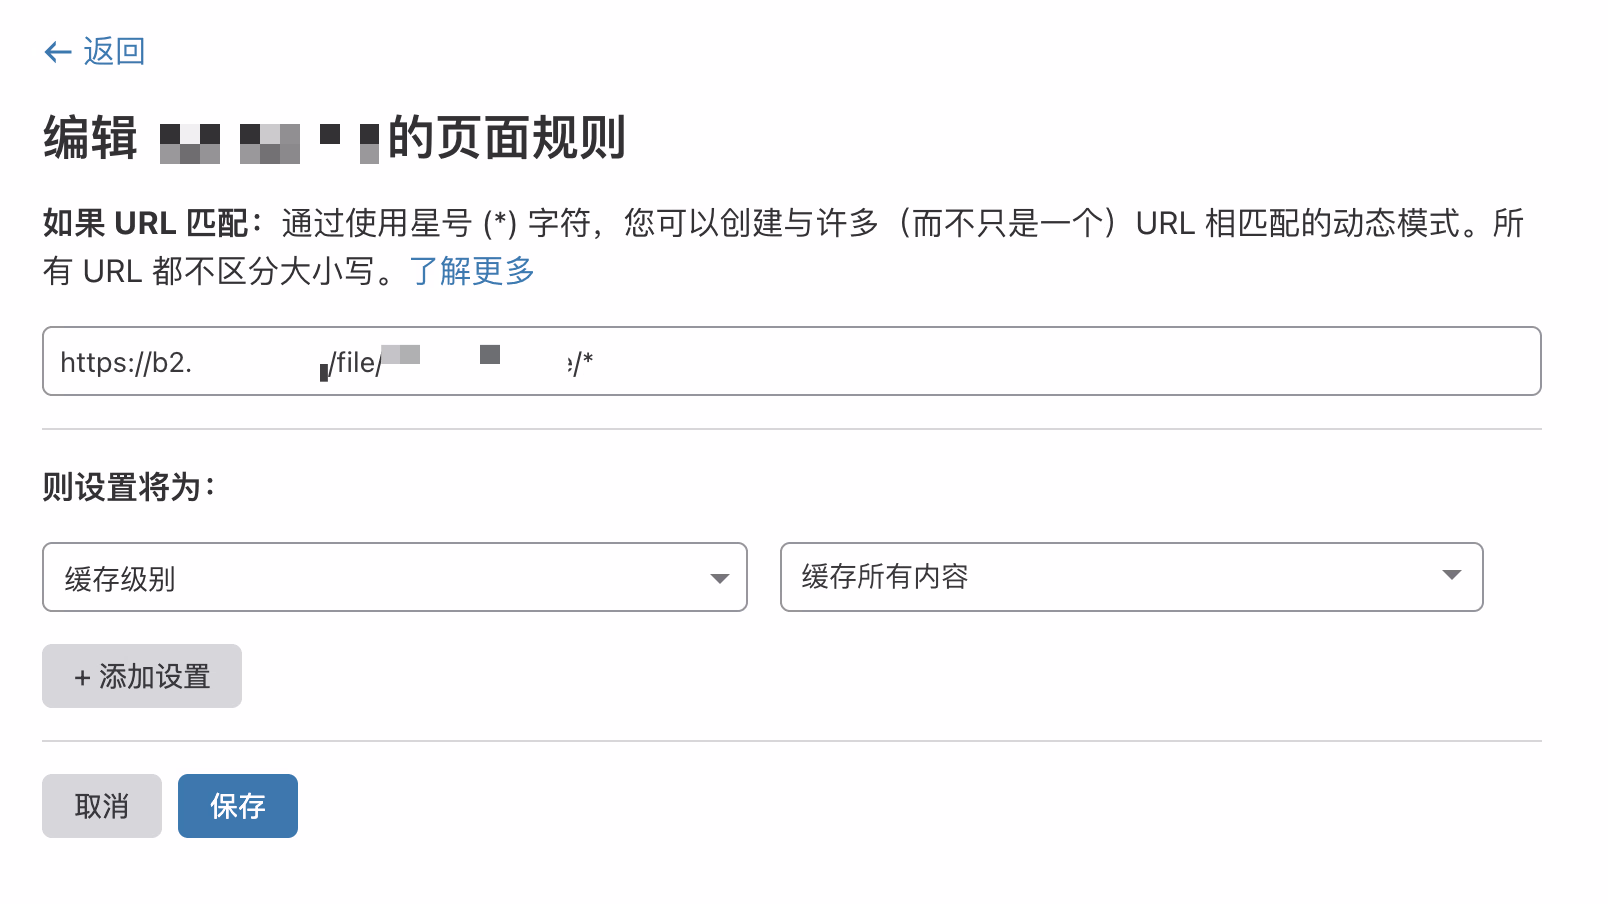
添加设置中选择 缓存级别 - 缓存所有内容
-
再添加一条
URL 匹配填写如下内容
1https://<解析的域名>/file/*/*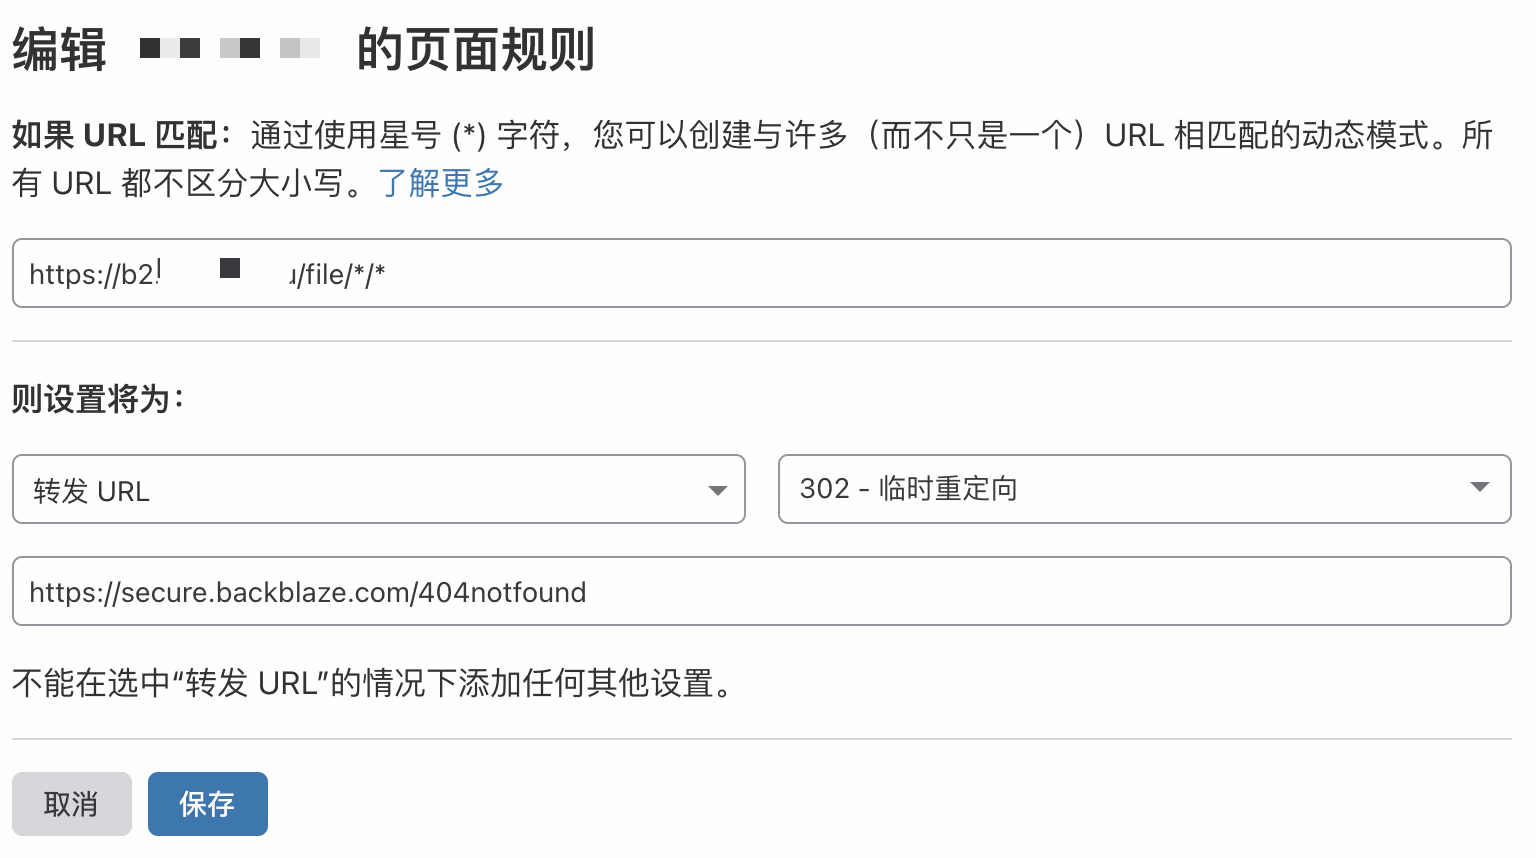
设置填写 转发 URL - 302重定向 - https://secure.backblaze.com/404notfound
-
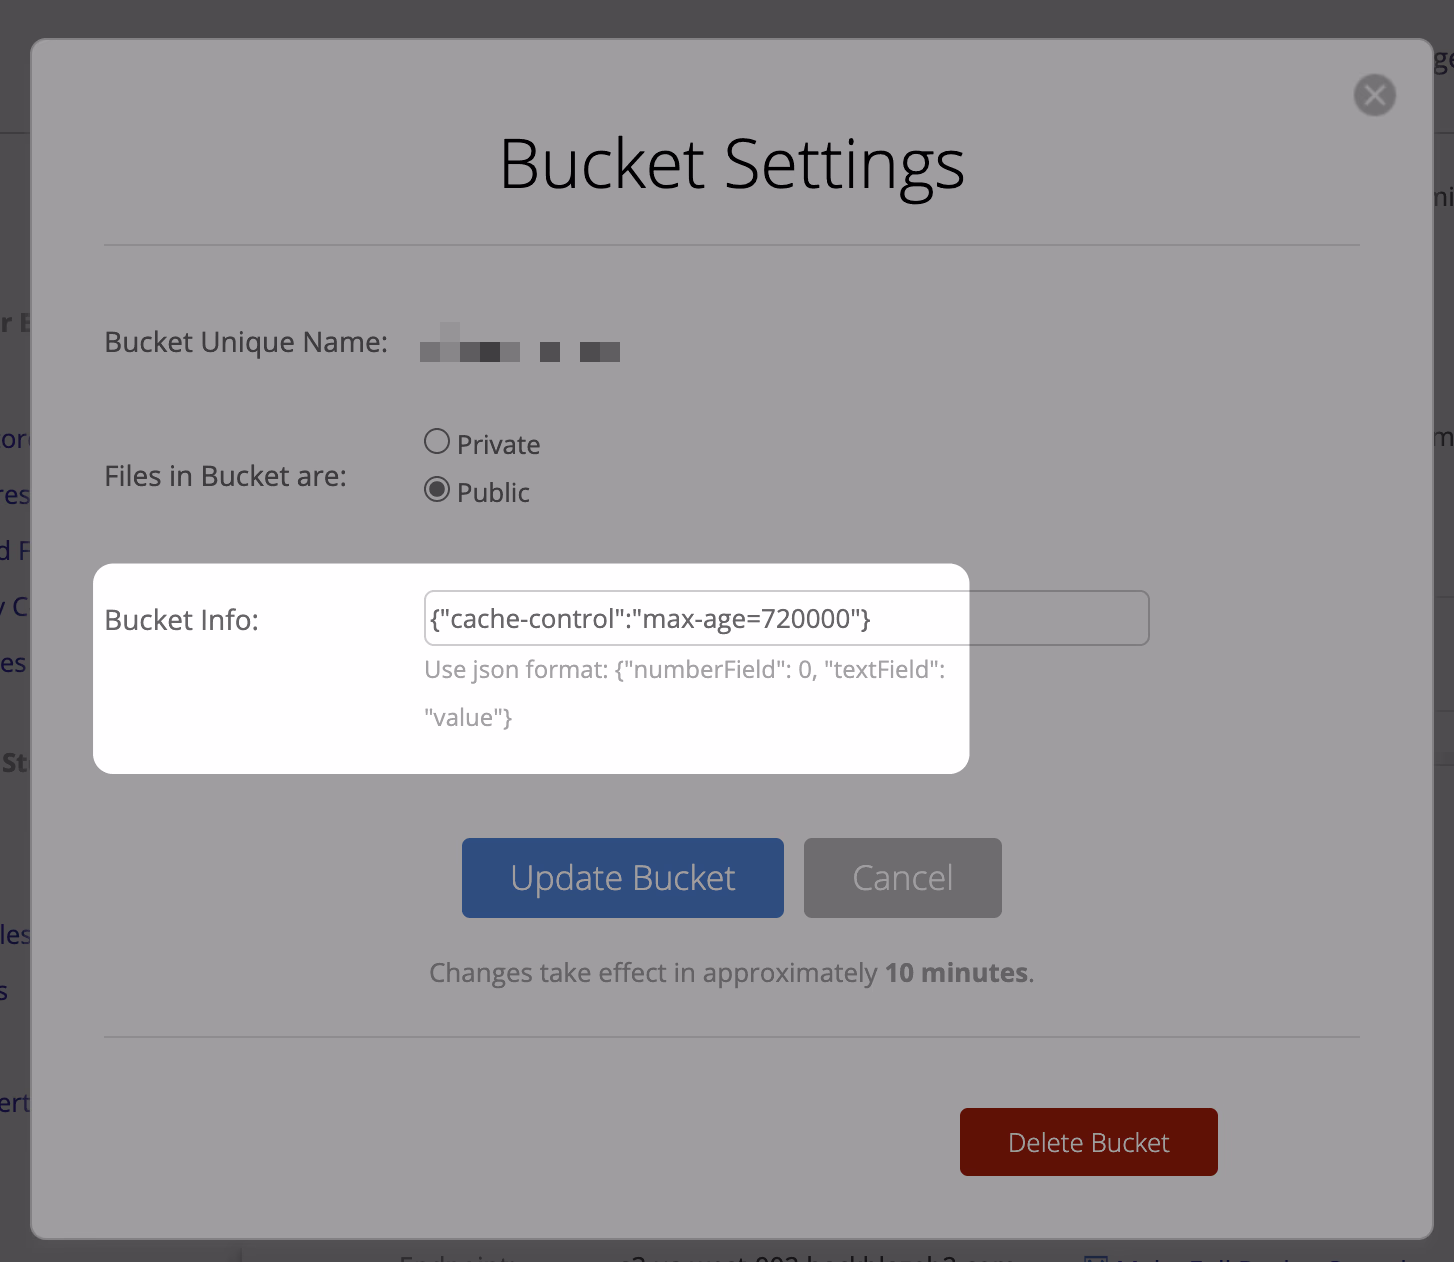
设定缓存控制时间,内容如下
1{"cache-control":"max-age=720000"}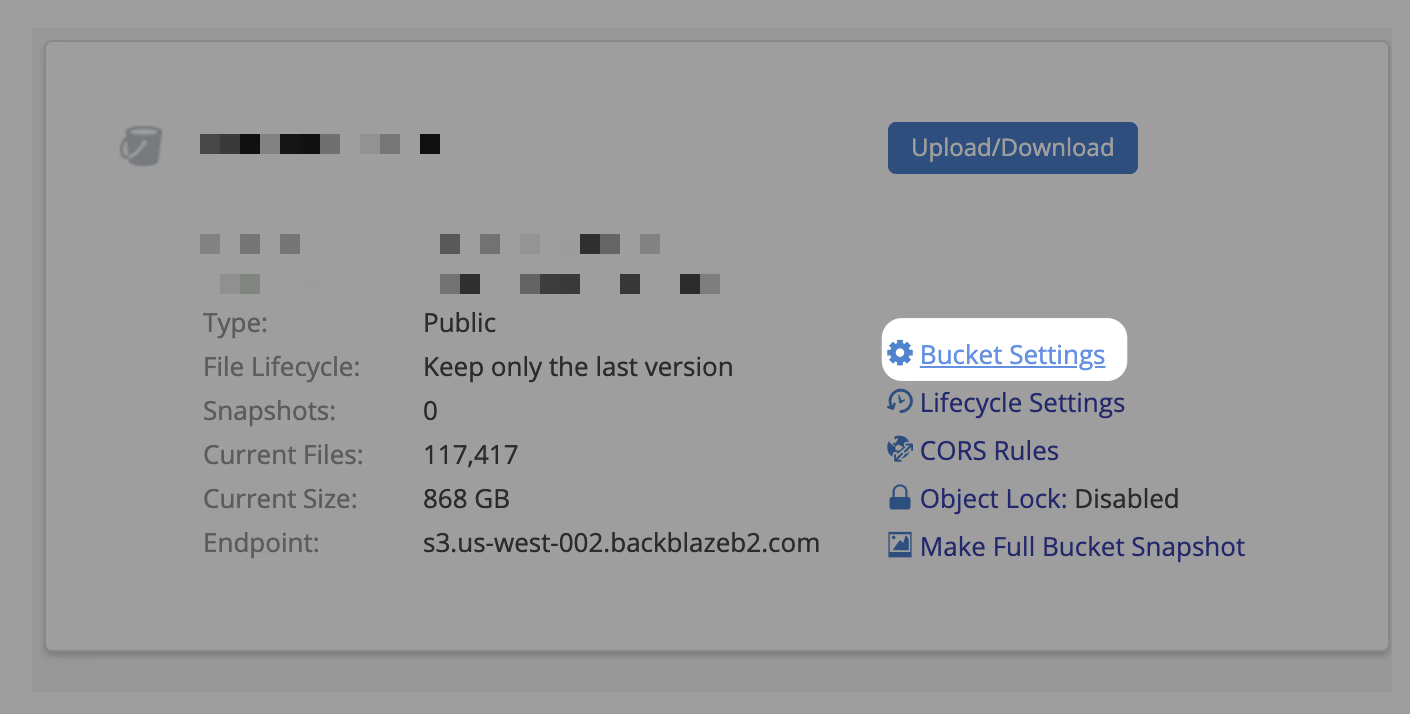
隐藏 Bucket 名称
这样设置完后,虽然能免流了,但是 Bucket 名称还是暴露了,为了避免被人搞事情,所以要隐藏 Bucket 名称。这里用到了 cf 的 workers,参考下面站点的内容。
Using Backblaze B2 and Cloudflare Workers for free image hosting
-
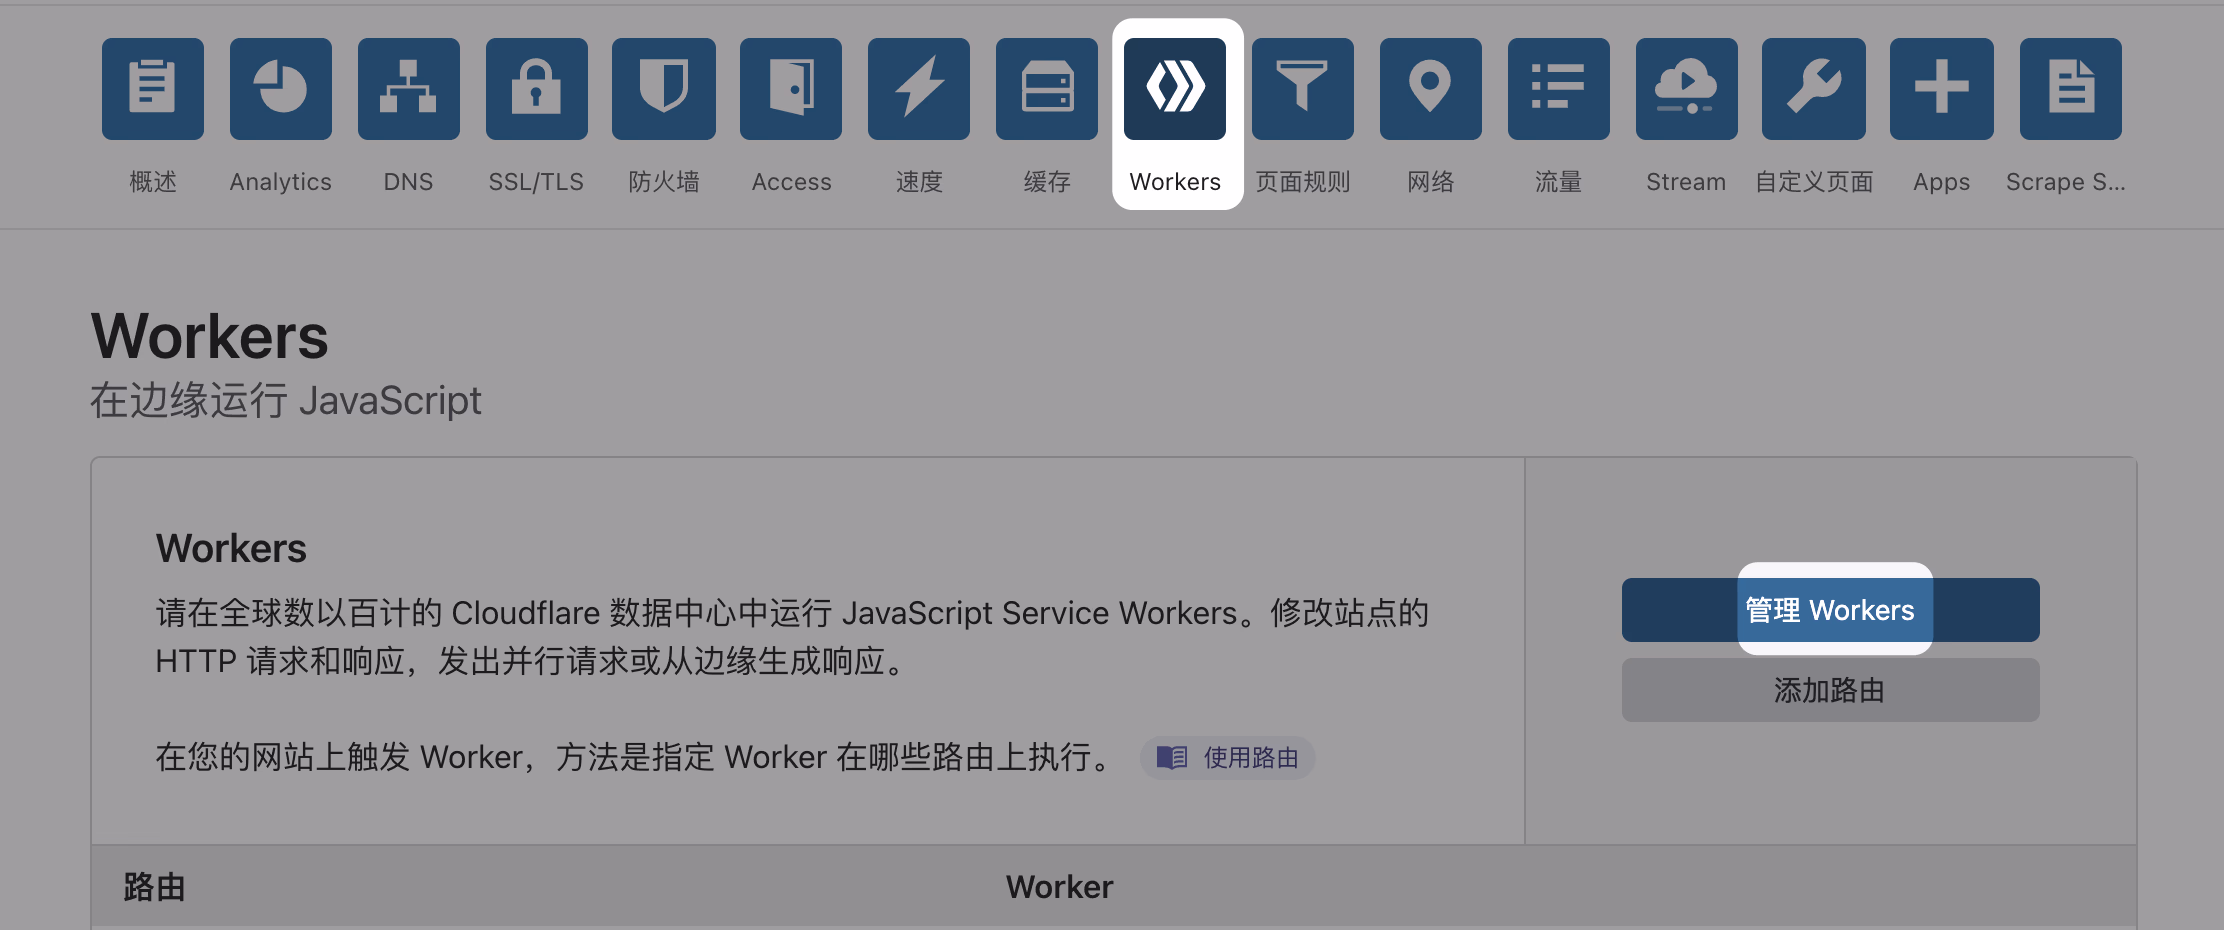
Workers - 管理 Workers
-
添加一个 Worker 并部署,内容如下。你需要做的就是修改开头的 b2Domain 和 b2Bucket 两个变量即可。
 1
 2
 3
 4
 5
 6
 7
 8
 9
10
11
12
13
14
15
16
17
18
19
20
21
22
23
24
25
26
27
28
29
30
31
32
33
34
35
36
37
38
39
40
41
42
43
44
45
46
47
48
49
50
51
52
53
54
55
56
57
58
59
60
61
62
63
64
65
66
67
68
69
70
71
72
73
74
75
76
77
'use strict'; const b2Domain = 'files.jross.me'; // configure this as per instructions above const b2Bucket = 'jross-files'; // configure this as per instructions above const b2UrlPath = `/file/${b2Bucket}/`; addEventListener('fetch', event => { return event.respondWith(fileReq(event)); }); // define the file extensions we wish to add basic access control headers to const corsFileTypes = ['png', 'jpg', 'gif', 'jpeg', 'webp']; // backblaze returns some additional headers that are useful for debugging, but unnecessary in production. We can remove these to save some size const removeHeaders = [ 'x-bz-content-sha1', 'x-bz-file-id', 'x-bz-file-name', 'x-bz-info-src_last_modified_millis', 'X-Bz-Upload-Timestamp', 'Expires' ]; const expiration = 31536000; // override browser cache for images - 1 year // define a function we can re-use to fix headers const fixHeaders = function(url, status, headers){ let newHdrs = new Headers(headers); // add basic cors headers for images if(corsFileTypes.includes(url.pathname.split('.').pop())){ newHdrs.set('Access-Control-Allow-Origin', '*'); } // override browser cache for files when 200 if(status === 200){ newHdrs.set('Cache-Control', "public, max-age=" + expiration); }else{ // only cache other things for 5 minutes newHdrs.set('Cache-Control', 'public, max-age=300'); } // set ETag for efficient caching where possible const ETag = newHdrs.get('x-bz-content-sha1') || newHdrs.get('x-bz-info-src_last_modified_millis') || newHdrs.get('x-bz-file-id'); if(ETag){ newHdrs.set('ETag', ETag); } // remove unnecessary headers removeHeaders.forEach(header => { newHdrs.delete(header); }); return newHdrs; }; async function fileReq(event){ const cache = caches.default; // Cloudflare edge caching const url = new URL(event.request.url); if(url.host === b2Domain && !url.pathname.startsWith(b2UrlPath)){ url.pathname = b2UrlPath + url.pathname; } let response = await cache.match(url); // try to find match for this request in the edge cache if(response){ // use cache found on Cloudflare edge. Set X-Worker-Cache header for helpful debug let newHdrs = fixHeaders(url, response.status, response.headers); newHdrs.set('X-Worker-Cache', "true"); return new Response(response.body, { status: response.status, statusText: response.statusText, headers: newHdrs }); } // no cache, fetch image, apply Cloudflare lossless compression response = await fetch(url, {cf: {polish: "lossless"}}); let newHdrs = fixHeaders(url, response.status, response.headers); response = new Response(response.body, { status: response.status, statusText: response.statusText, headers: newHdrs }); event.waitUntil(cache.put(url, response.clone())); return response; } -
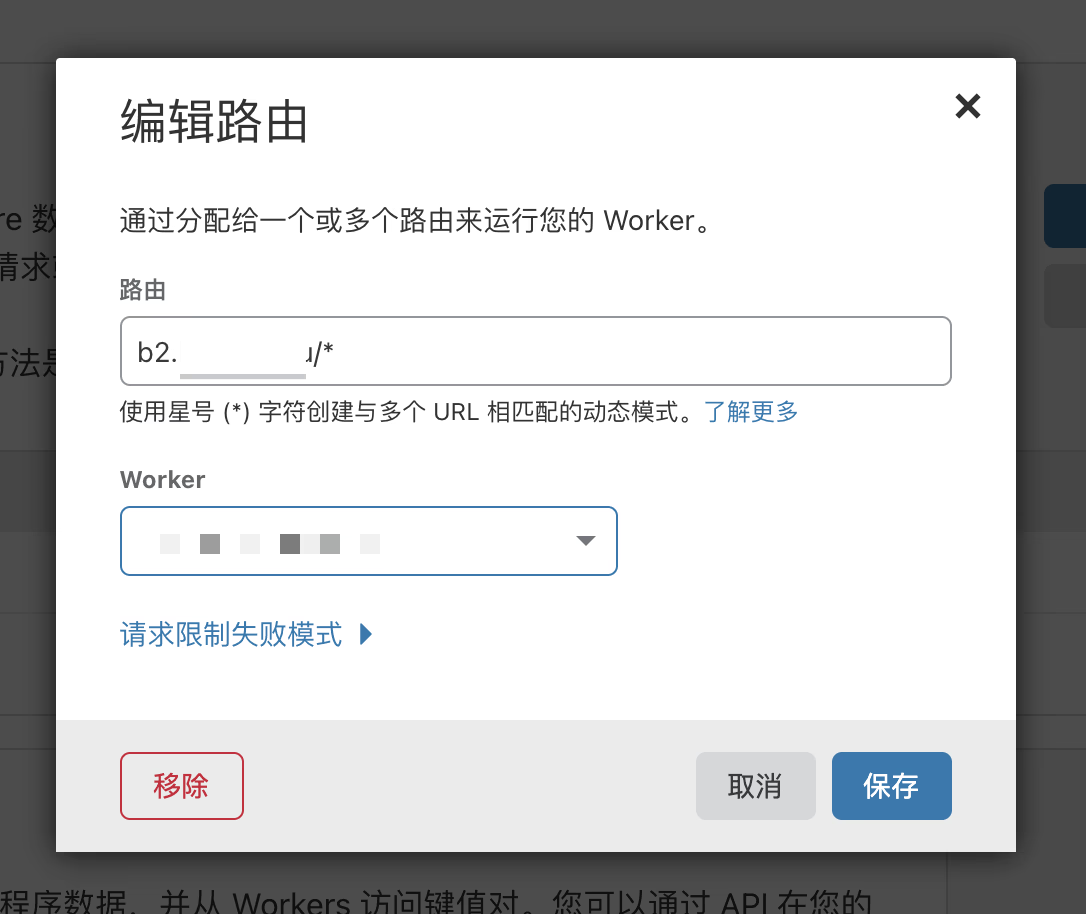
添加完后设置路由
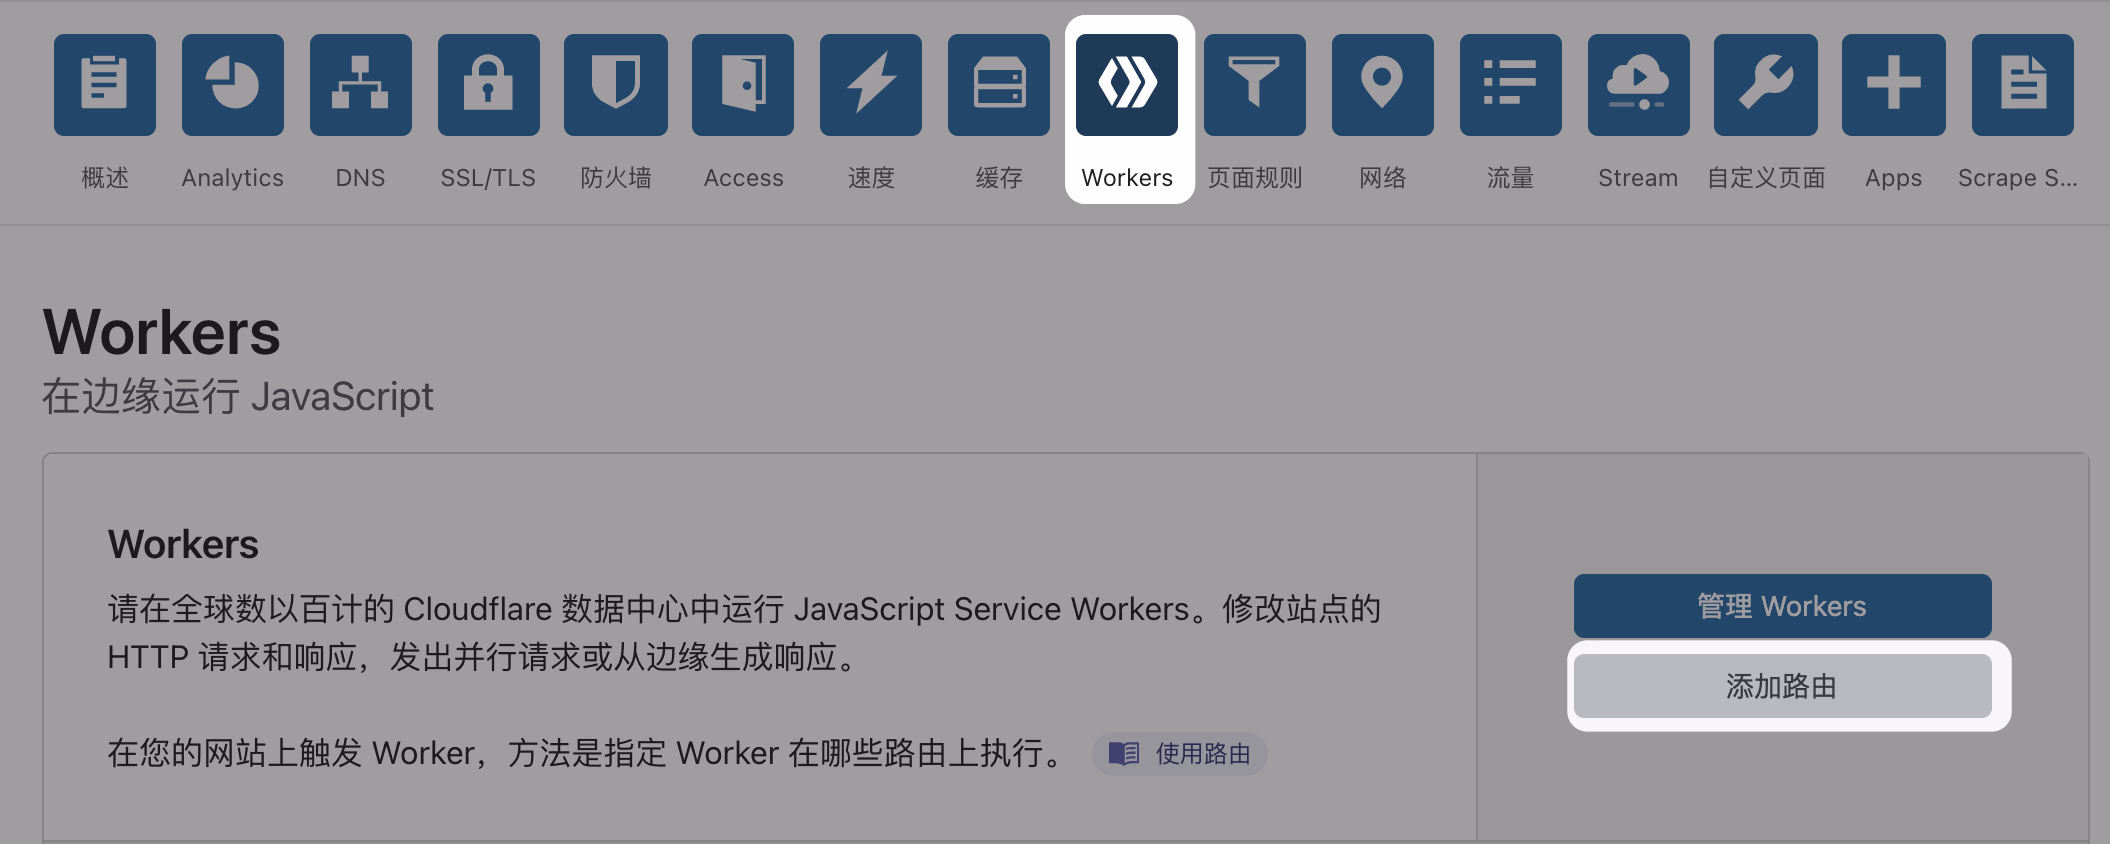
-
地址为
1<解析的域名>/*Worker 就选择刚才添加的 Worker
然后就可以直接通过 https://<域名>/<Bucket内路径> 引用文件了